This is a step-by-step overview of how to integrate the MediaPlayer framework and work with the MPMoviePlayerController class in iOS4.
Step 1: Add the MediaPlayer Framework
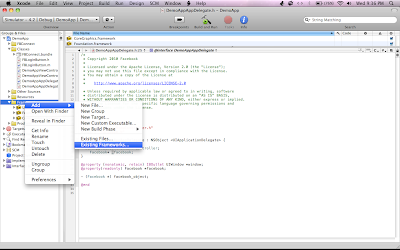
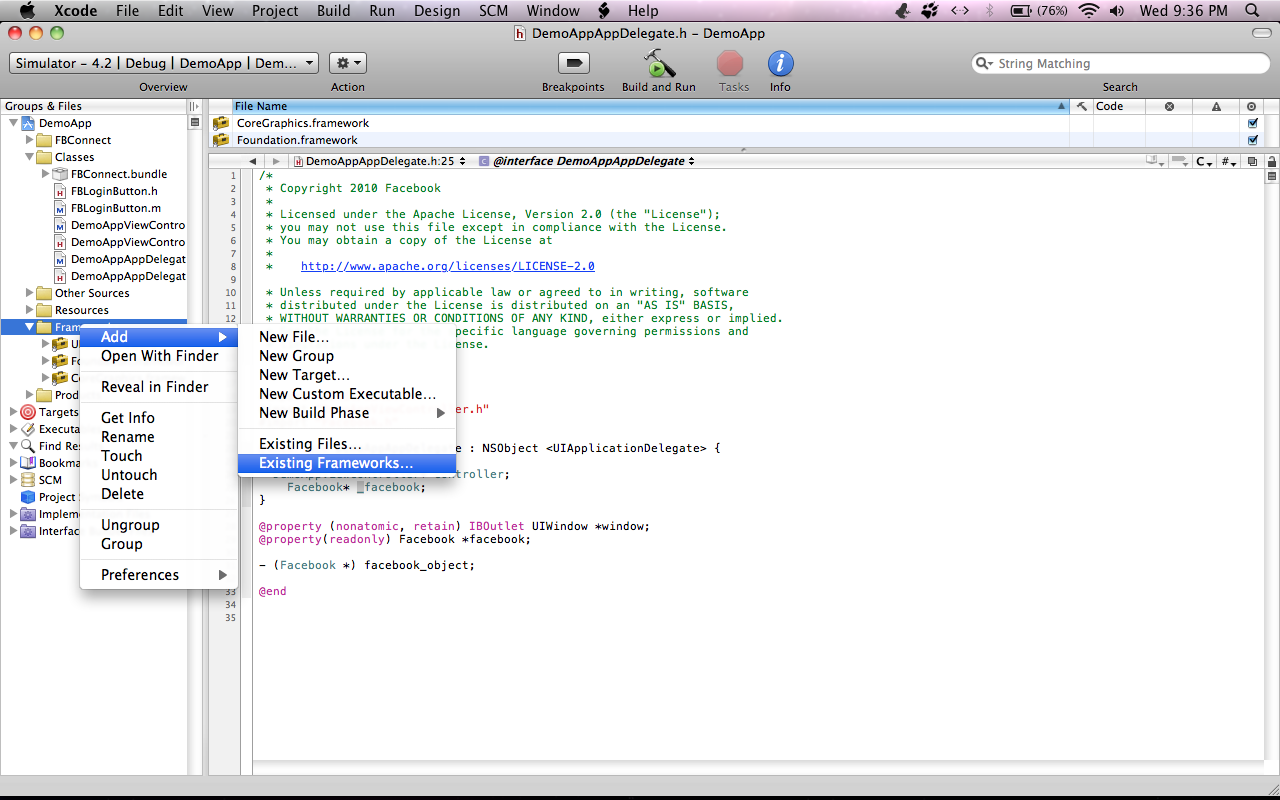
CTRL + Click (or right click) on the “Frameworks” folder in the “Groups & Files” pane in Xcode. Select Add > Existing Frameworks from the drop-down menu.
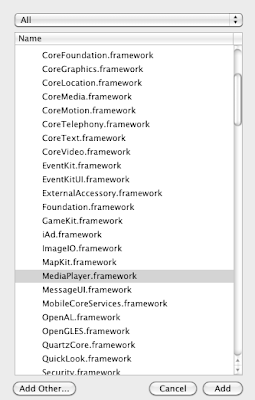
Select “MediaPlayer.framework” from the list of options presented, and click “Add.”
Step 2: Import the MediaPlayer Framework and Declare the playMovie Method
After adding the MediaPlayer framework into your project, you need to import it into the view controller responsible for playing the movie. Insert the following line at the top of .h file of your controller
Now we will declare an instance method will will be called to trigger movie playback.
Just above the @end statement in the header file, add this line
Step 3: Implementing the playMovie method
Open the .m file of your view controller and add the following implementation of playMovie: method which we have declared earlier in our header file
In the first line we create a NSString containing the file path to our movie file. Next line uses that file path to create NSURL to our local movie. Then we initialize the MPMoviePlayer with that file URL and adds it over the current view controller's view.
Now, open up viewController.xib file in Interface Builder and add a "Play" button. Connect it with our playMovie: method.
Step 4: Memory Management
In our playMovie: method, we explicitly allocated memory for the moviePlayerController object which is never being released. We cannot release this object in the method we allocated it in because our movie will still be playing at the time this method completes execution. It also isn’t safe to autorelease the object because we don’t know if our movie will still be playing the next time the autorelease pool is drained. Fortunately, the MPMoviePlayerController object is prebuilt to handle this scenario, and will dispatch a notification called MPMoviePlayerPlaybackDidFinishNotification to the NSNotificationCenter when playback completes. In order to receive this notification, we must register an “observer” to respond to that specific notification. To do so, modify our playMovie: method as follows:
We now need to create moviePlaybackComplete:, the selector we just registered. Add the following underneath the playMovie: method:
The object we set for "object" parameter is sent along with the notification later. In this method, first we are retrieving that object with the [notification object] statement and referencing it with a new MPMoviePlayerController pointer. Next, we again send a message to the NSNotificationCenter, this time removing the observer we registered in playMovie. On nect line we cleanup our custom view controller by removing the moviePlayerController view from our display, and then we finish out by releasing the memory we originally allocated in the playMovie method.
Congratulations! We now have a working movie player in our application. My next post will be dedicated to customization of the player.
Step 1: Add the MediaPlayer Framework
CTRL + Click (or right click) on the “Frameworks” folder in the “Groups & Files” pane in Xcode. Select Add > Existing Frameworks from the drop-down menu.
Select “MediaPlayer.framework” from the list of options presented, and click “Add.”

Step 2: Import the MediaPlayer Framework and Declare the playMovie Method
After adding the MediaPlayer framework into your project, you need to import it into the view controller responsible for playing the movie. Insert the following line at the top of .h file of your controller
#import
#import
Now we will declare an instance method will will be called to trigger movie playback.
Just above the @end statement in the header file, add this line
-(IBAction)playMovie:(id)sender;
Step 3: Implementing the playMovie method
Open the .m file of your view controller and add the following implementation of playMovie: method which we have declared earlier in our header file
- (IBAction)playMovie:(id)sender
{
NSString *filepath = [[NSBundle mainBundle] pathForResource:@"sample-movie-clip" ofType:@"m4v"];
NSURL *fileURL = [NSURL fileURLWithPath:filepath];
MPMoviePlayerController *moviePlayerController = [[MPMoviePlayerController alloc] initWithContentURL:fileURL];
[self.view addSubview:moviePlayerController.view];
moviePlayerController.fullscreen = YES;
[moviePlayerController play];
}
In the first line we create a NSString containing the file path to our movie file. Next line uses that file path to create NSURL to our local movie. Then we initialize the MPMoviePlayer with that file URL and adds it over the current view controller's view.
Now, open up viewController.xib file in Interface Builder and add a "Play" button. Connect it with our playMovie: method.
Step 4: Memory Management
In our playMovie: method, we explicitly allocated memory for the moviePlayerController object which is never being released. We cannot release this object in the method we allocated it in because our movie will still be playing at the time this method completes execution. It also isn’t safe to autorelease the object because we don’t know if our movie will still be playing the next time the autorelease pool is drained. Fortunately, the MPMoviePlayerController object is prebuilt to handle this scenario, and will dispatch a notification called MPMoviePlayerPlaybackDidFinishNotification to the NSNotificationCenter when playback completes. In order to receive this notification, we must register an “observer” to respond to that specific notification. To do so, modify our playMovie: method as follows:
NSString *filepath = [[NSBundle mainBundle] pathForResource:@"sample-movie-clip" ofType:@"m4v"];
NSURL *fileURL = [NSURL fileURLWithPath:filepath];
MPMoviePlayerController *moviePlayerController = [[MPMoviePlayerController alloc] initWithContentURL:fileURL];
[[NSNotificationCenter defaultCenter] addObserver:self
selector:@selector(moviePlaybackComplete:)
name:MPMoviePlayerPlaybackDidFinishNotification
object:moviePlayerController];
[self.view addSubview:moviePlayerController.view];
moviePlayerController.fullscreen = YES;
[moviePlayerController play];
We now need to create moviePlaybackComplete:, the selector we just registered. Add the following underneath the playMovie: method:
- (void)moviePlaybackComplete:(NSNotification *)notification
{
MPMoviePlayerController *moviePlayerController = [notification object];
[[NSNotificationCenter defaultCenter] removeObserver:self
name:MPMoviePlayerPlaybackDidFinishNotification
object:moviePlayerController];
[moviePlayerController.view removeFromSuperview];
[moviePlayerController release];
}
The object we set for "object" parameter is sent along with the notification later. In this method, first we are retrieving that object with the [notification object] statement and referencing it with a new MPMoviePlayerController pointer. Next, we again send a message to the NSNotificationCenter, this time removing the observer we registered in playMovie. On nect line we cleanup our custom view controller by removing the moviePlayerController view from our display, and then we finish out by releasing the memory we originally allocated in the playMovie method.
Congratulations! We now have a working movie player in our application. My next post will be dedicated to customization of the player.